Knowledge Bases
In One Sentence
A Knowledge Base (KB) is an organization-level repository of documents, policies, and reference guides that your agents search in real time to ground customer conversations in accurate company facts.
Why It Exists
Customer support policies change frequently — warranties update, return windows shift, and product catalogs expand. By maintaining source-of-truth documents in central Knowledge Bases rather than hardcoding facts into prompt instructions, your team can update company information in one place and have it instantly reflected across all attached agents.
How Knowledge Bases Work
SupportOS uses semantic vector search (Retrieval-Augmented Generation) to match customer questions with relevant paragraphs in your indexed documents.
Knowledge Base Hierarchy
Knowledge is organized into distinct containers within your organization:
| Element | Description | Example |
|---|---|---|
| Organization | Top-level account container | Acme Corp |
| Knowledge Base | Thematic collection of related documents | Billing & Refund Policies |
| Document Entry | An individual file indexed inside the KB | refund-terms.docx |
| Attached Agent | Any agent authorized to retrieve facts from this KB | Billing Support Agent |
Creating a Knowledge Base
To set up a new knowledge repository:
- Navigate to Knowledge Base (
/knowledge-base) in the left sidebar. - Click New Knowledge Base in the top right header.
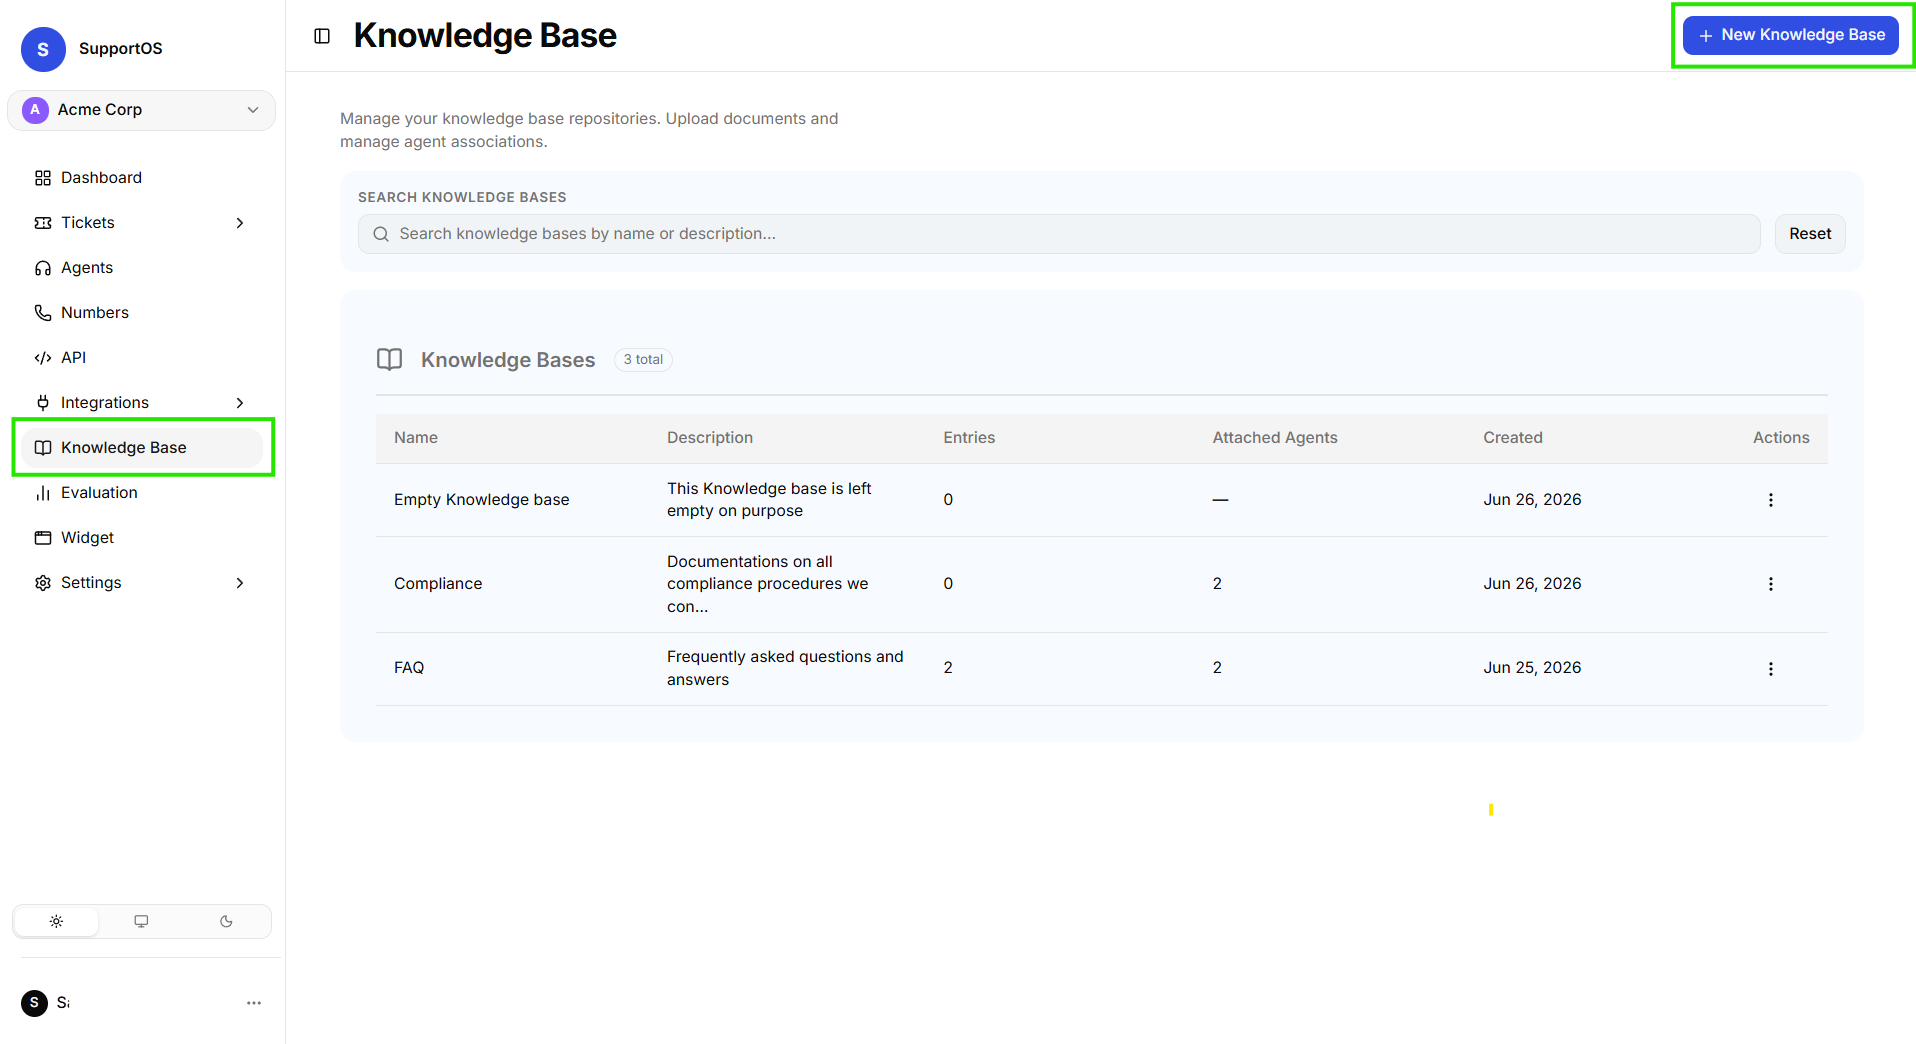 Click the New Knowledge Base button in the top right of the Knowledge Base dashboard to create a new repository.
- In the dialog, provide:
- Name: Required (up to 25 characters).
- Description: Optional (up to 150 characters).
- Click Create. You will be redirected directly to your new Knowledge Base container.
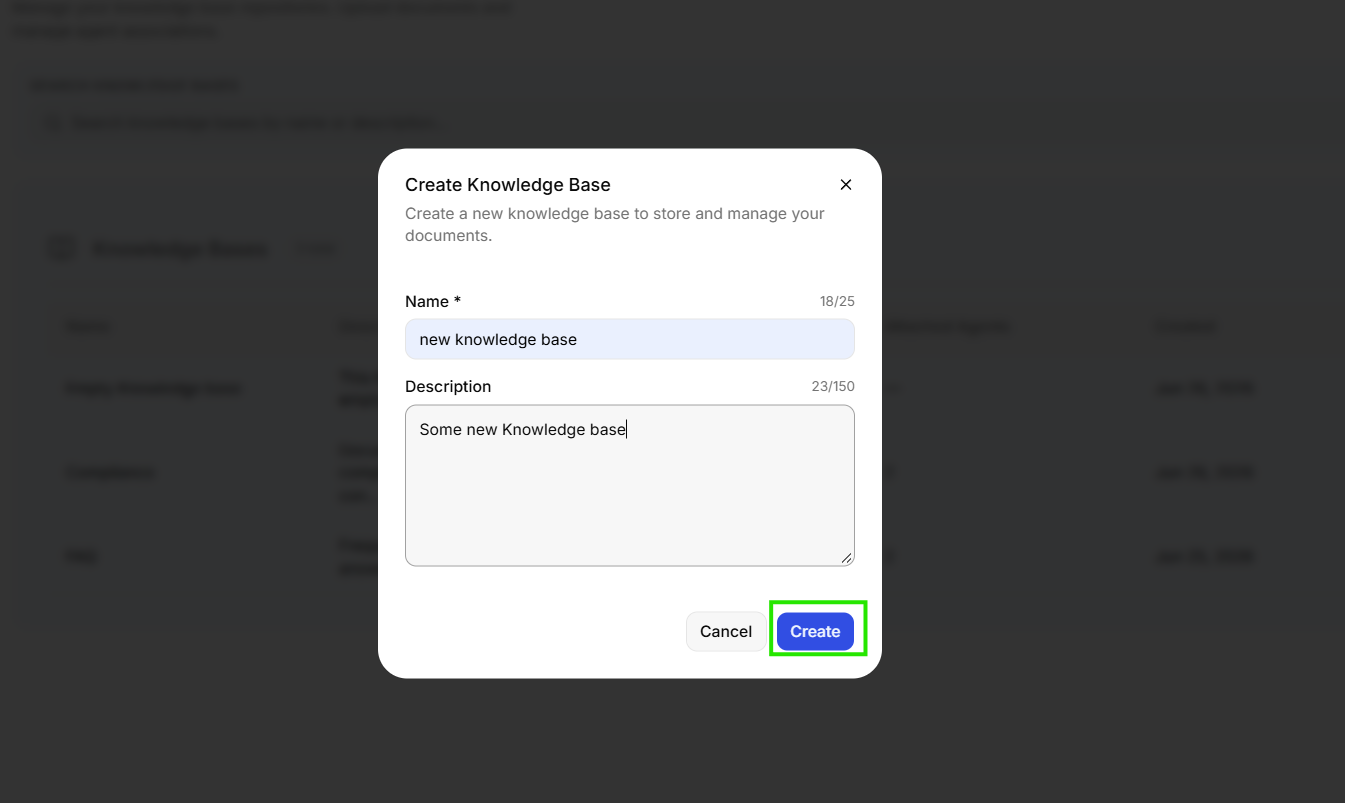 Provide a concise name and description for your knowledge repository, then click Create.
Managing Documents & Entries
Once inside a Knowledge Base (/knowledge-base/view?id=...), you can view container statistics, manage indexed document entries, and attach agents.
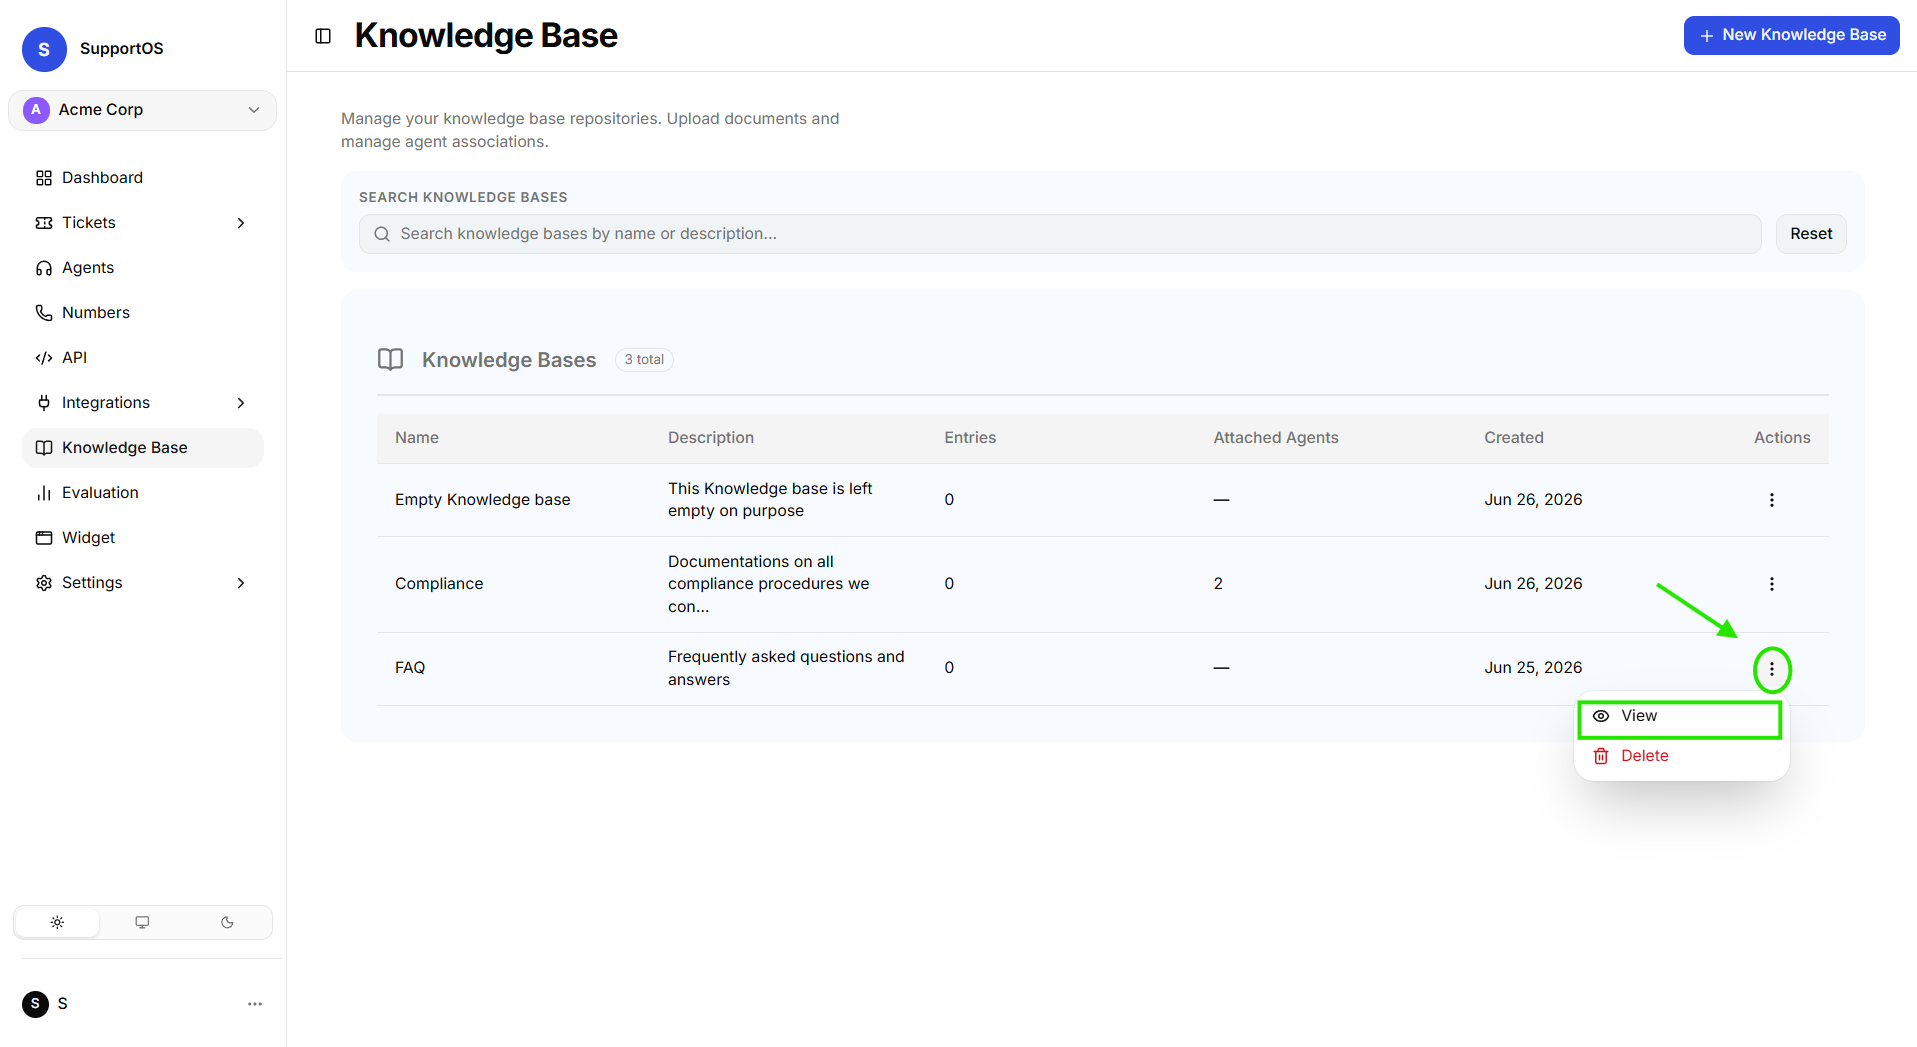 Click any Knowledge Base row in the list to open its container management view.
Uploading Documents
To add new documents to your knowledge base:
- In the Knowledge Base view, click Upload Document in the top action bar.
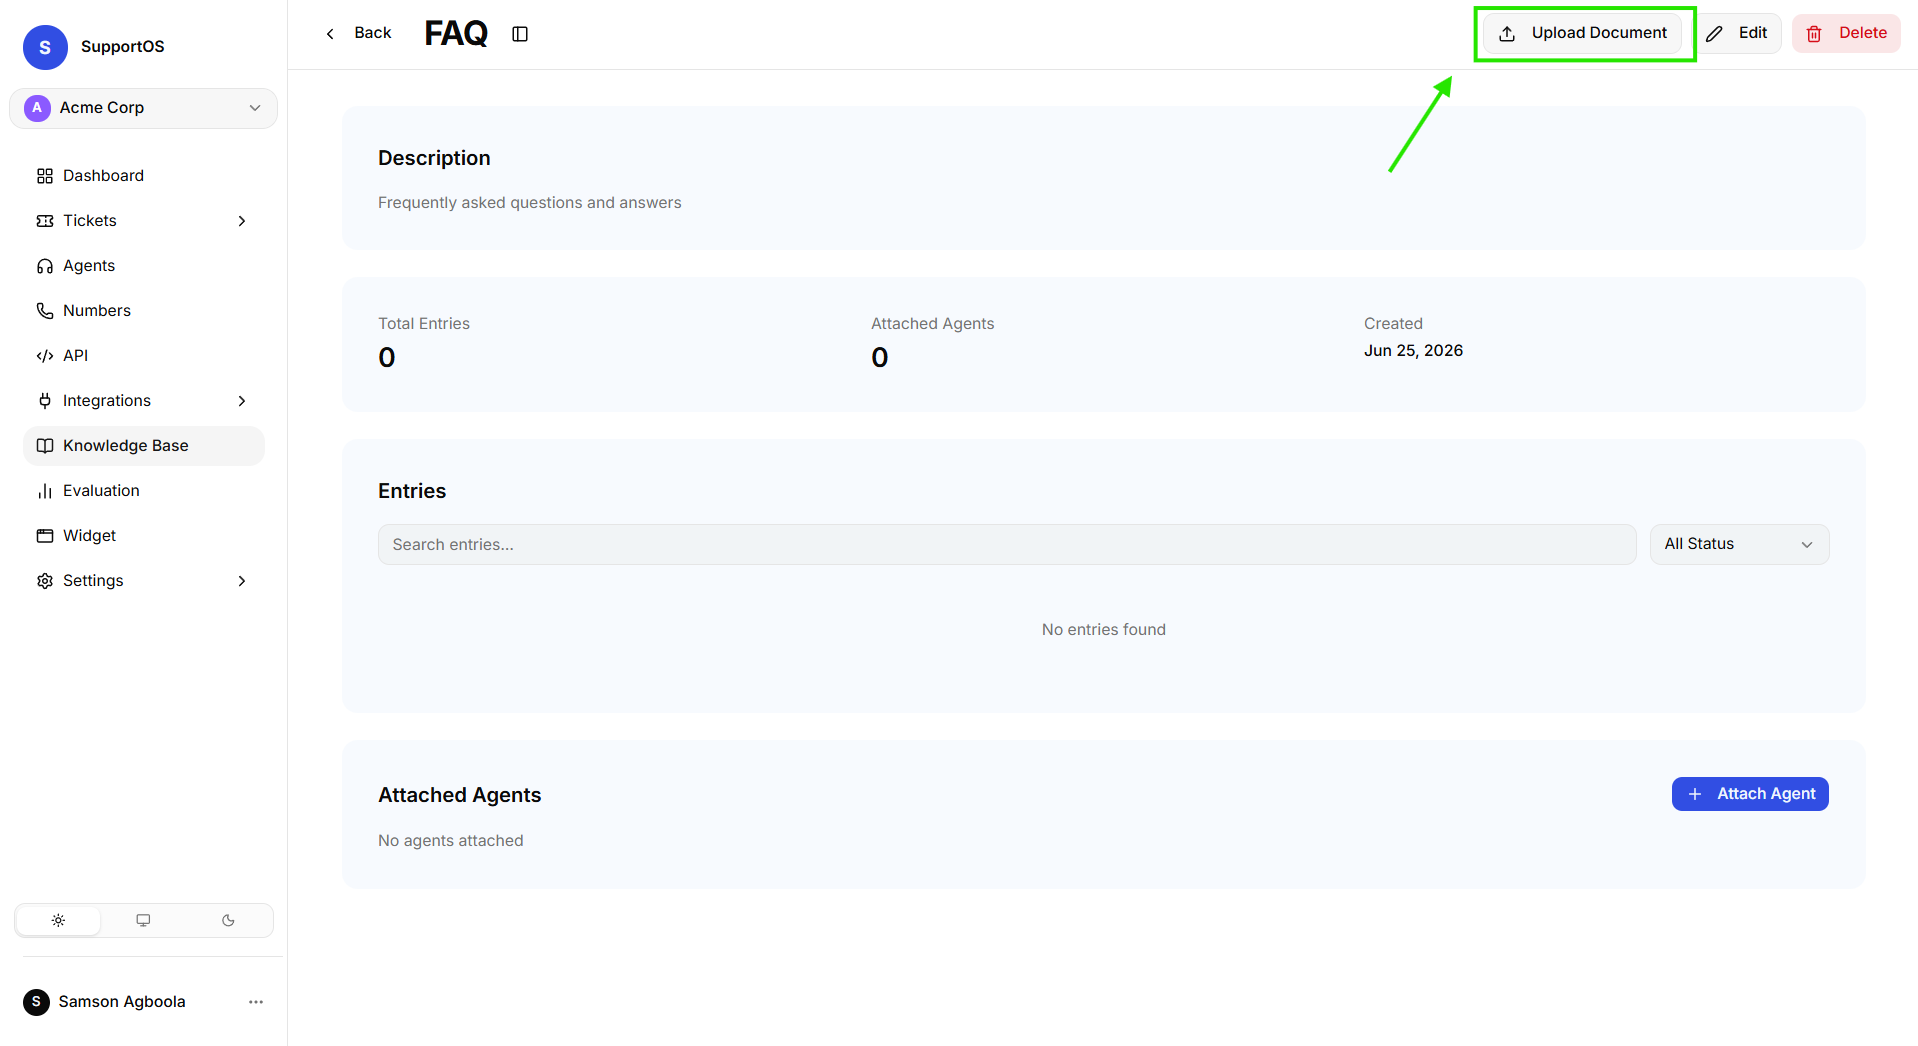 Inside your Knowledge Base container, click the Upload Document button in the top action bar.
- Select or drop a file from your computer.
- Verify the file name and size, then click Upload.
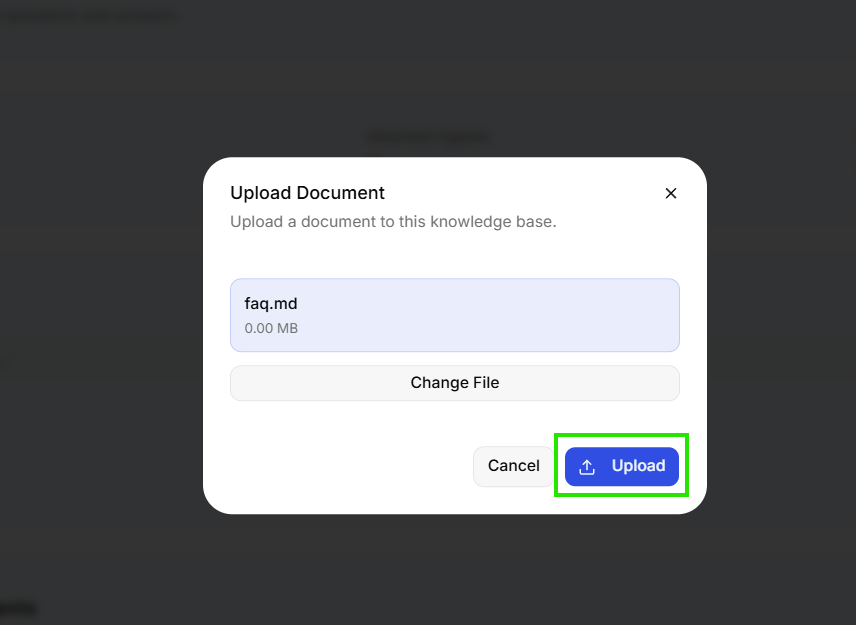 Select or drop a
.docx, .md, or .txt file into the upload dropzone and click Upload.
Supported Formats & File Specifications
| Format | Extension | Notes |
|---|---|---|
| Microsoft Word | .docx | Standard formatted word processing documents |
| Markdown | .md | Markdown files and documentation exports |
| Plain Text | .txt | Unformatted UTF-8 / ASCII text files |
Only .docx, .md, and .txt files are supported. Convert PDF files, spreadsheets, or scanned images to text or docx prior to uploading.
Document Indexing Lifecycle
When a file is uploaded, SupportOS processes it through an automated vectorization pipeline before agents can query its contents:
| Status | Badge Color | Meaning | Agent Access |
|---|---|---|---|
| Processing | Blue | Document is being parsed, chunked, and vectorized | Agent cannot yet retrieve facts from this document |
| Indexed | Green | Document is fully vectorized and ready for retrieval | Agent immediately retrieves facts from this document |
| Failed | Red | Document could not be parsed | Retrieval disabled; action required: re-upload file |
Always ensure your newly uploaded documents display the green Indexed badge before running test sessions in the Simulator. Queries made while an entry is still Processing will not retrieve facts from that document.
Attaching Knowledge Bases to Agents
You can link knowledge bases to agents using either of two methods:
Method A: From the Knowledge Base Detail Page
- Navigate to Knowledge Base and open the target knowledge base.
- Scroll to the Attached Agents section and click Attach Agent.
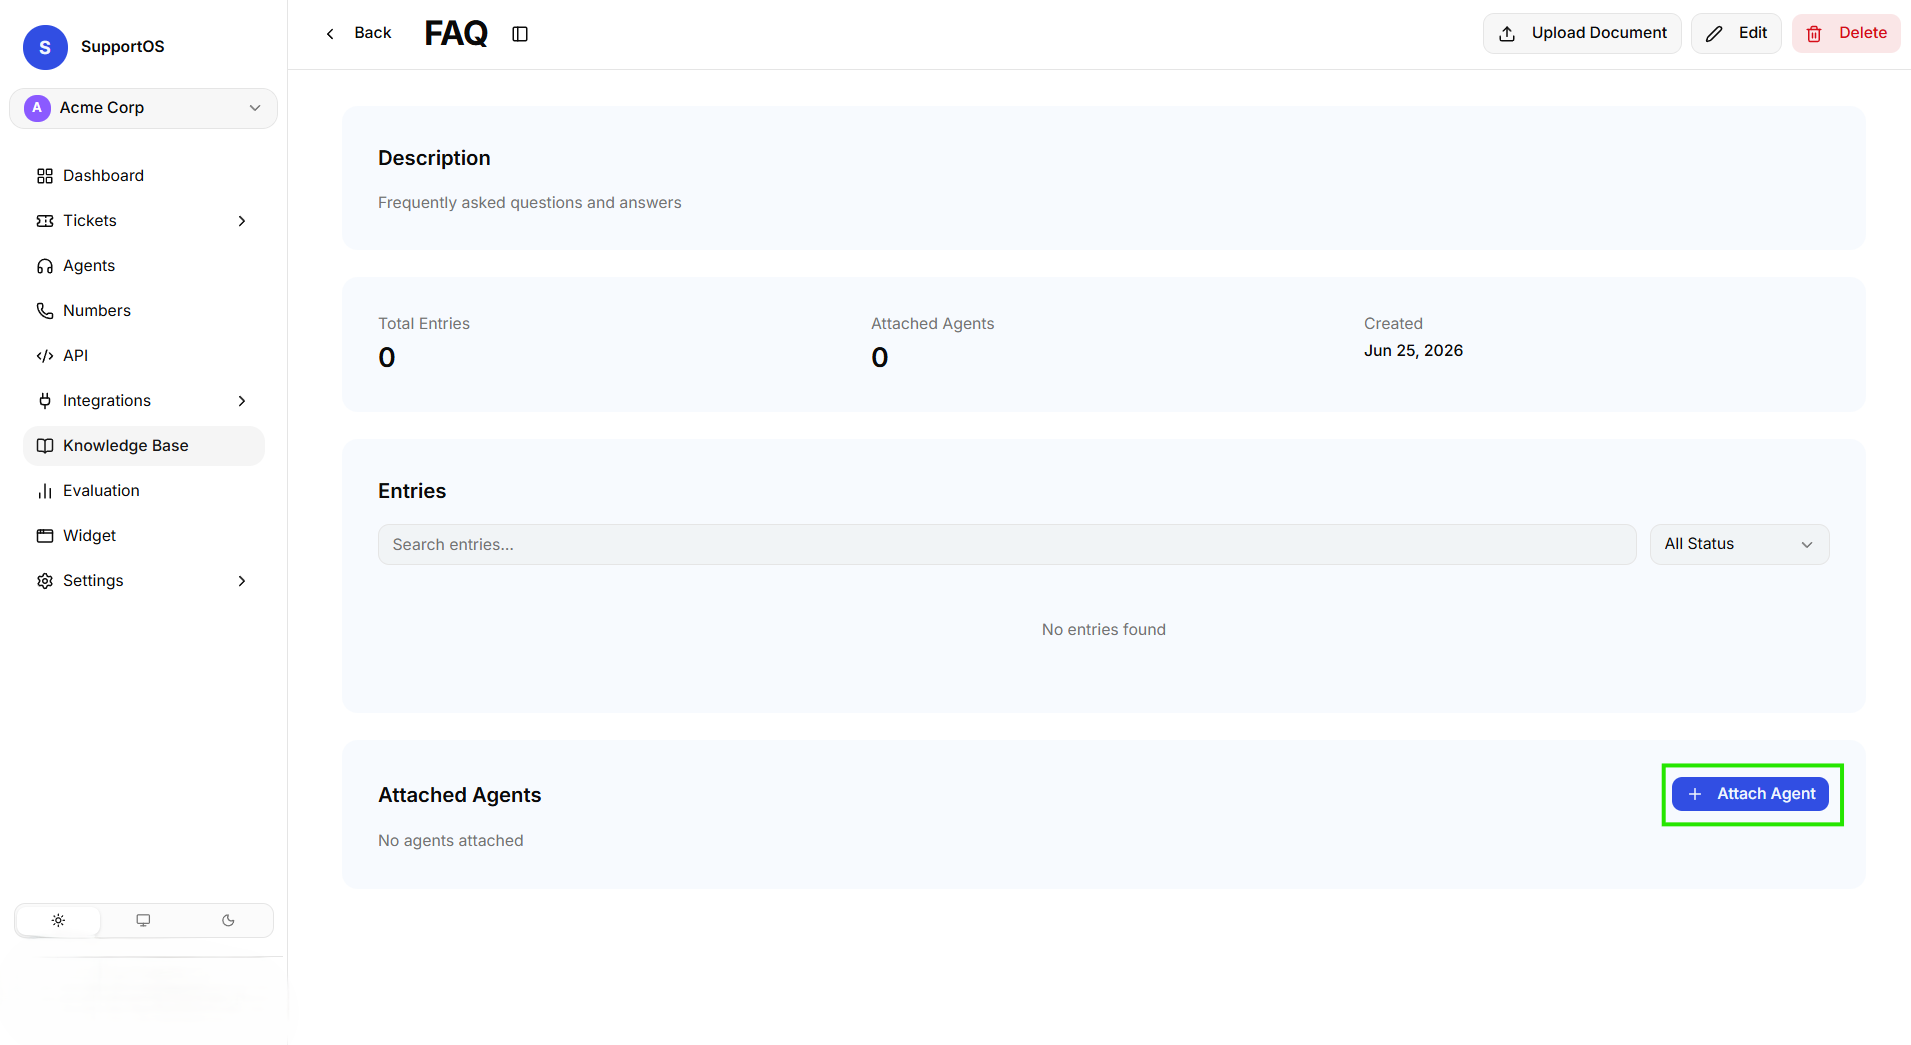 Scroll to the Attached Agents section and click Attach Agent.
- Select the desired agent from the dropdown menu and click Attach.
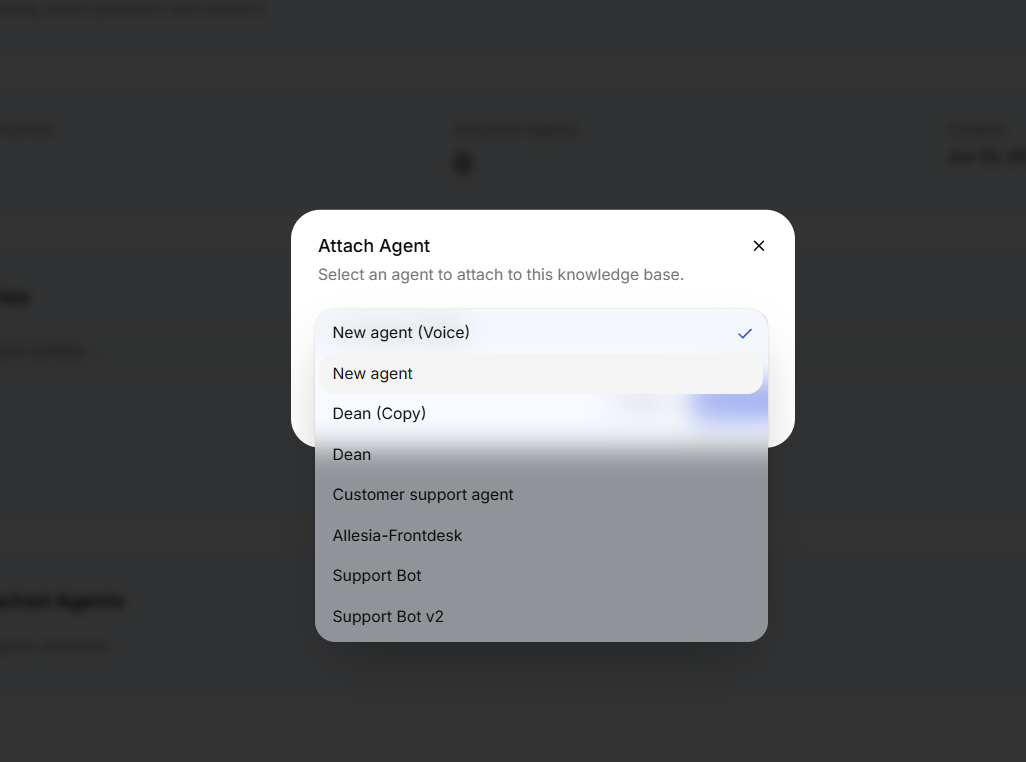 Select the desired agent from the dropdown menu and click Attach.
Method B: From the Agent Builder
- Navigate to Agents and open your agent in the builder.
- Navigate to the Integrations tab.
- Under Knowledge Bases, check the box next to your desired knowledge base card.
- Click Save or Publish to update the agent configuration.
- Knowledge Bases: Use for factual reference information, static policies, and FAQs.
- Scenarios: Use when the agent must follow a sequential, step-by-step procedural workflow or ask specific follow-up questions. See the Scenarios vs. Knowledge Bases Guide for detailed best practices.
Next Steps
- API Tools — Connect external REST APIs to enable live data lookups and transactional actions.
- Testing with the Simulator — Test knowledge base document retrieval using the interactive chat and voice simulator.