Tags
In One Sentence
Tags are structured categorization labels assigned to customer tickets automatically by the AI or manually by your support team to track issue trends, filter inbox queues, and power analytics.
Why It Exists
Support operations process thousands of customer conversations. Without standardized tagging, identifying recurring customer pain points or pinpointing spikes in shipping delays requires manually reading hundreds of transcripts. SupportOS provides a centralized organization-level tag catalog that enables automated AI classification, instant inbox filtering, and high-level trend reporting.
Tag Structure & Organization Catalog
Every tag in your organization's catalog contains two core fields:
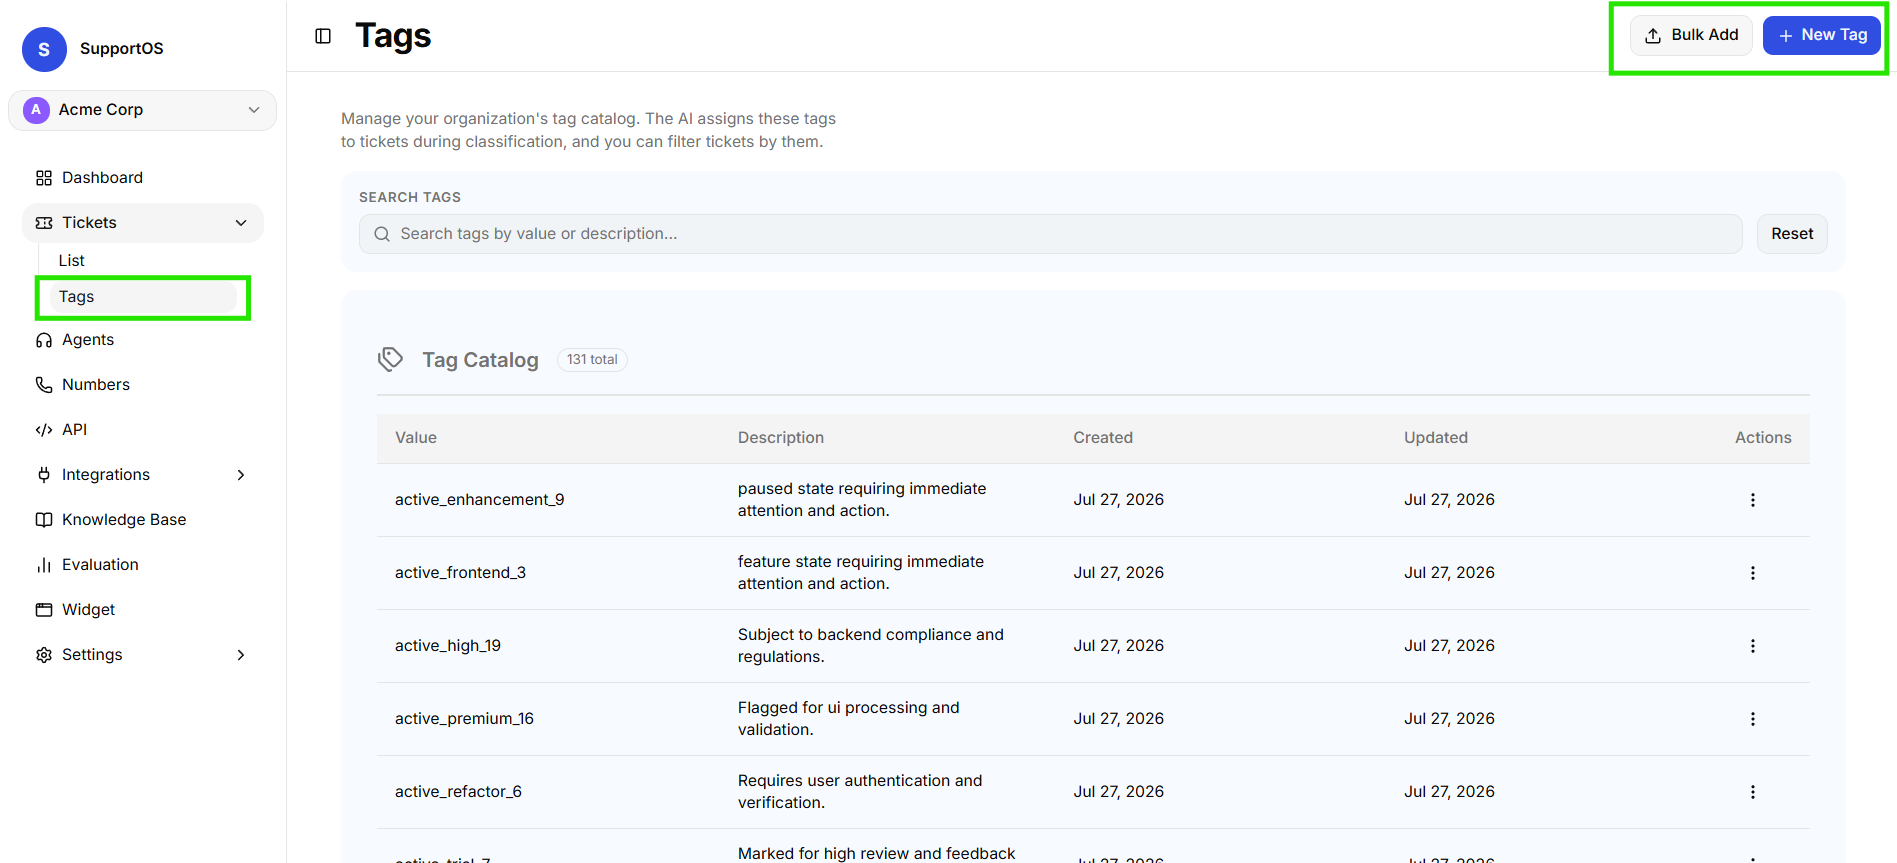 Organization tags catalog table displaying tag values, descriptions, usage counts, and action buttons.
| Field | Requirement | Purpose & Format Guidelines |
|---|---|---|
| Tag Value | Required | Unique tag identifier (1–64 characters). Must be snake_case using lowercase letters, numbers, and single underscores (e.g., refund_request, kyc_verification). Must be unique in your organization. |
| Tag Description | Optional | Context summary (up to 500 characters) explaining what the tag represents. The AI uses this description during the post-session pipeline to determine when to auto-apply the tag. |
Creating a Single Tag
To add an individual tag to your organization's catalog:
- Navigate to Tickets > Tags (
/tickets/tags) in the left sidebar. - Click the New Tag button in the top right.
- In the modal, enter the Value in snake_case (e.g.,
damaged_item_claim). - Enter an optional Description describing when this tag applies (e.g., "Customer reports receiving a physically broken or defective package").
- Click Create Tag.
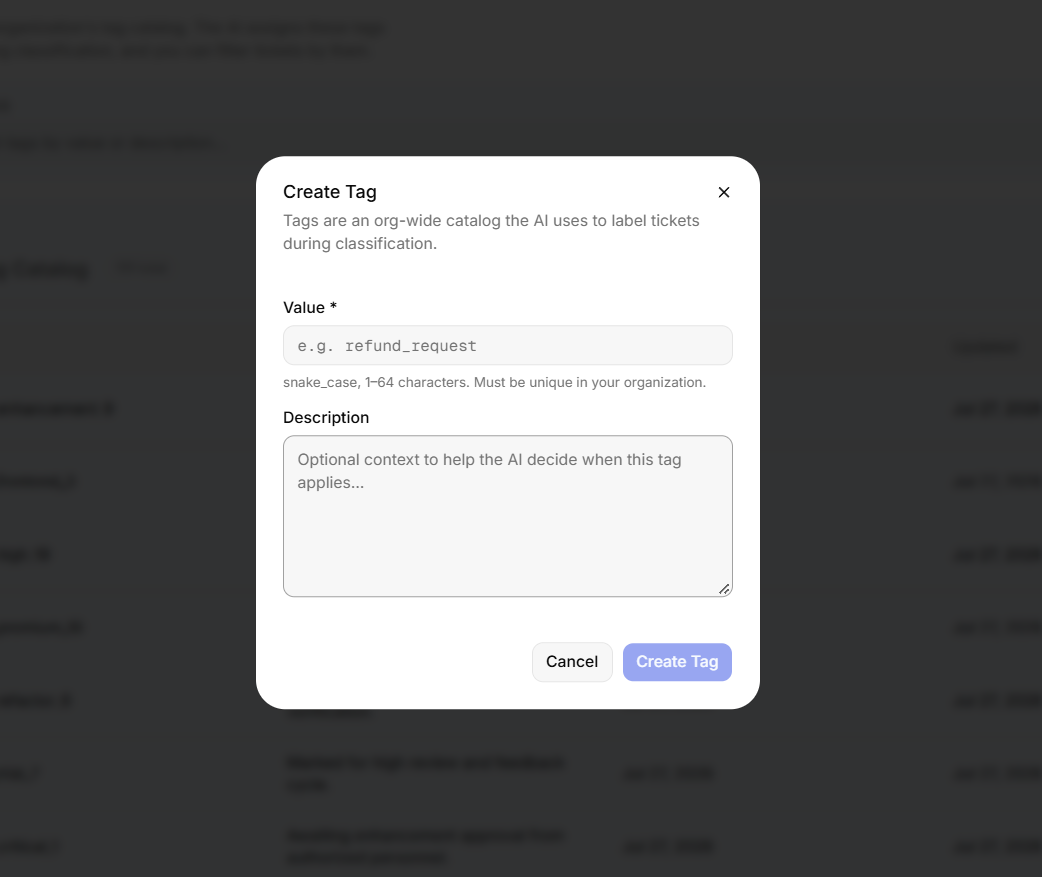 Enter a unique snake_case tag identifier and context description for automated classification.
Bulk Adding Tags
When setting up your workspace or migrating an existing taxonomy from another helpdesk, you can use the Bulk Add workflow to import multiple tags at once.
SupportOS supports three flexible bulk creation modes:
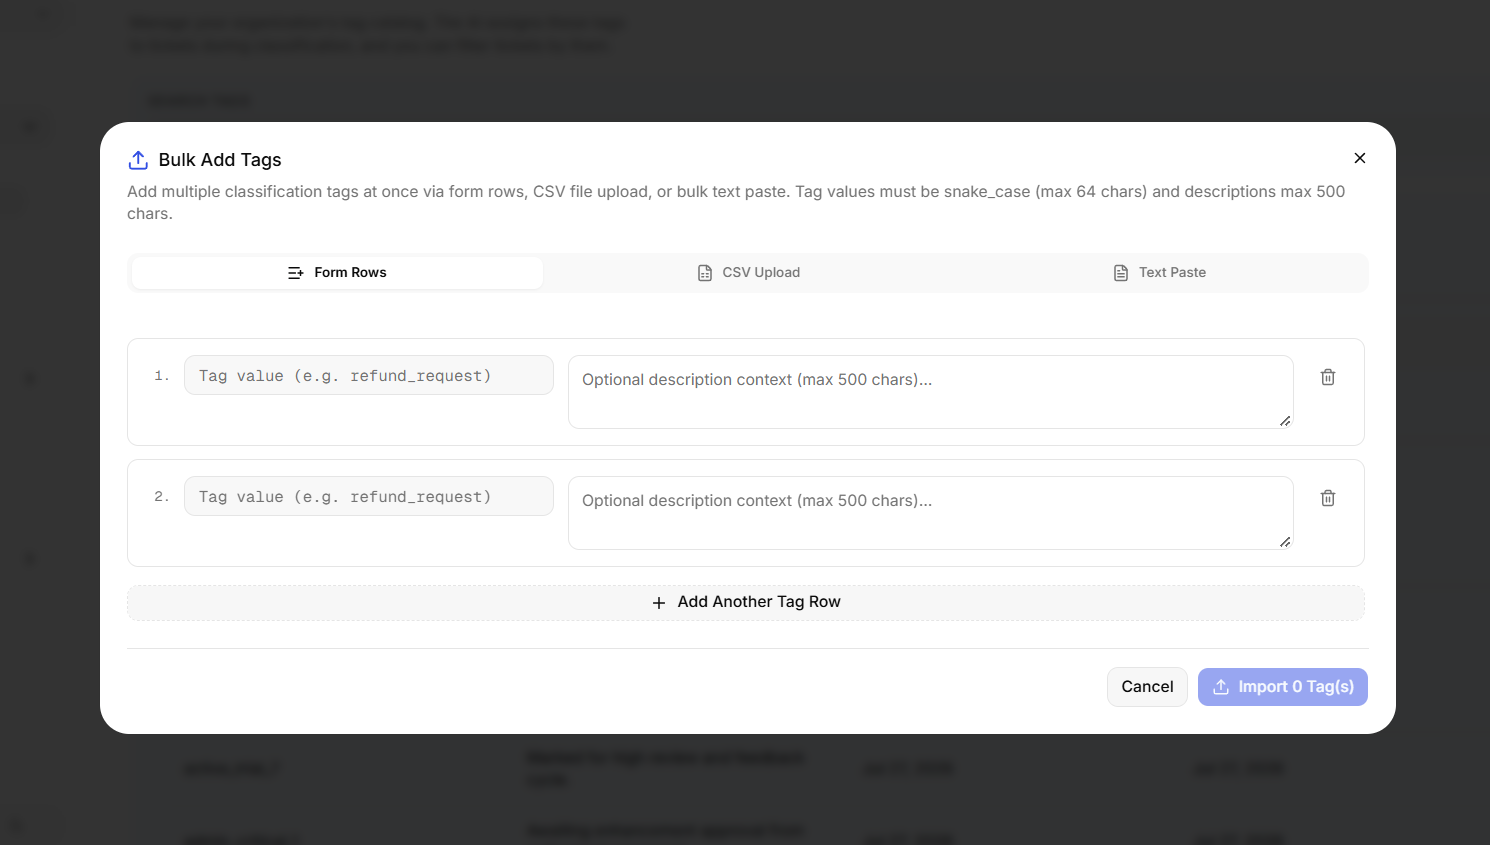 Bulk tag import modal supporting Form Rows, CSV spreadsheet uploads, and comma-separated Text Paste modes.
Mode 1: Form Rows
The interactive row builder lets you rapidly enter multiple tags directly in the interface:
- Click Bulk Add at the top of the Tags table.
- Select the Form Rows tab (selected by default).
- Type the Tag value (snake_case, max 64 chars) and optional Description (max 500 chars) in each row.
- Click Add Another Tag Row (
+) to insert additional rows. - Click the Trash icon to remove unwanted rows.
- Click Import Tags.
Mode 2: CSV Upload
For large taxonomies exported from spreadsheets:
- Select the CSV Upload tab in the Bulk Add modal.
- Click the dropzone to select your
.csvfile. - The expected format is:
value, description(or onetag_valueper row). - SupportOS previews the parsed tags and validates that all values meet snake_case rules. You can click Edit in Form Rows to adjust parsed items before saving.
- Click Import Tags.
Mode 3: Text Paste
For quick unstructured tag lists:
- Select the Text Paste tab in the Bulk Add modal.
- Paste your raw tags as comma-separated values (e.g.,
refund_request, kyc_verification, billing_issue) or one tag per line (e.g.,tag_value, description context). - SupportOS automatically parses the text into validated tag entries.
- Click Import Tags.
A single bulk import operation supports up to 100 tags at once. If your taxonomy exceeds 100 tags, split your import into multiple batches.
How Tags Are Applied
SupportOS supports both automated AI classification and manual agent tagging:
1. Automated AI Tagging at Runtime
During the post-session processing pipeline, the AI evaluates the full customer transcript against your organization's tag descriptions. If a conversation meets the criteria for one or more tags (e.g., the customer asked for a return exception and expressed frustration), the AI attaches those tags to the ticket automatically.
2. Manual Tagging on Tickets
Live agents and QA managers can adjust tags at any time:
- Open any ticket from the Tickets Inbox.
- In the Overview section of the ticket detail panel, review existing tag chips.
- Add new organization tags or remove any misapplied tag by clicking its Remove icon.
Filtering & Auditing by Tag
Once tags are populated across your tickets, you can use the filter bar to isolate specific customer trends:
- Escalation Reviews: Filter by
human-handofforsupervisor-requestedto audit conversations where AI could not resolve the customer's request. - Fulfillment Issues: Filter by
shipping-delayto measure the volume of delivery inquiries following a carrier outage. - Top Tags Dashboard: View your organization's analytics dashboard to see weekly distribution charts of top customer issue categories.
Next Steps
- Tickets & Recordings Overview — Review session transcripts, sentiment analysis, and audio recordings.
- Agent Evaluation & Benchmarks — Run synthetic benchmark suites to verify agent accuracy before live deployment.